
Design Notes
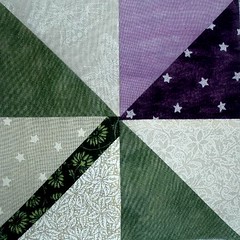
When I saw Victoria's sketch, I immediately thought of this block, for which I had written a block pattern for the April 2011 Block Lotto. My first thought was to make a small quilt using this block, using made fabric for the triangles, but decided that, instead, I wanted to try something new.
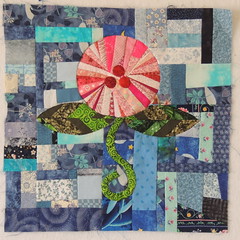
I started wondering what it would look like if I turned all the straight lines in the sketch into curves.
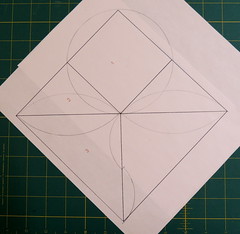
(You might have to squint, or click to enlarge, to see my penciled curves and circle.)
I also decided I want an on-point orientation.
Construction Notes
I had some smallish squares of blue made fabric which I sewed together to form the 14 inch background and some tiny pink strings that I pieced into a vaguely circular shape. The green fabric for the leaves was foundation pieced onto muslin.
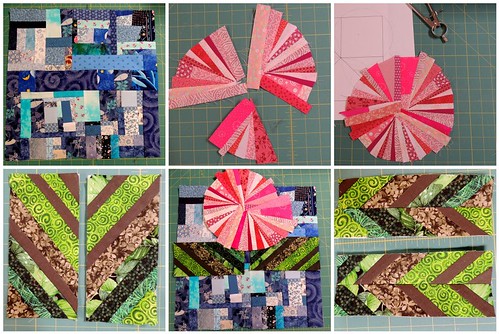
I used Dale Fleming's 6 minute circle technique to inset and sew the leaf shapes and the circle bloom into the background. I had sewn simple circles (with 1-fabric background and 1-fabric circles) using this technique, but wasn't sure it would work with the additional bulk of using made fabrics. I also had never inset anything with points, like the leaf shapes.
Because the circle bloom overlapped the leaves, I created two templates (from freezer paper) and made them as large as the background, to help me keep it all aligned. First I inset the leaves, one at a time because they met in the center, then added the circle. I wasn't sure that my sewing machine was going to like sewing through the many layers of made fabric and the glue that was holding everything together, especially at the bottom of the circle, where I was sewing the circle into the leaf/background seams. Since it was a first for me, I took lots of photos of the process.
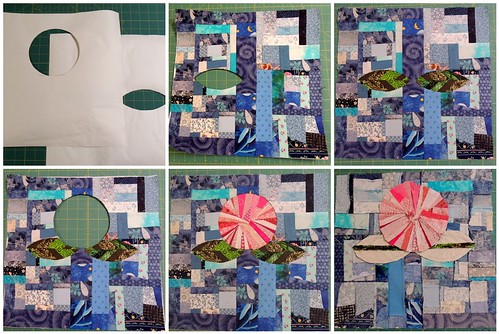
The last photo in the mosaic above shows the wrong side. I didn't really know that this technique would work, but it did, the first time, with no ripping and re-sewing. I was amazed ... and will definitely keep using it in future projects.
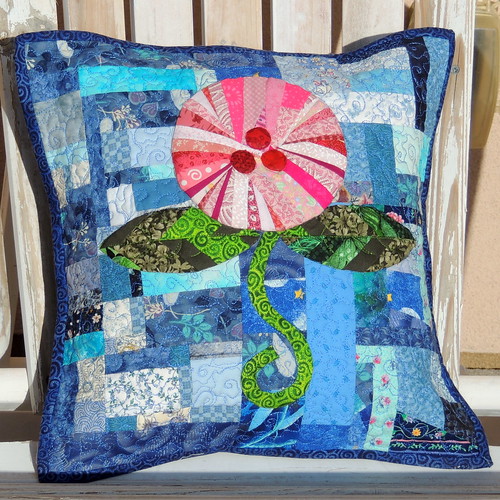
Since I knew it was going to become a pillow, I used a plain muslin fabric for the back ... which makes it easy to see the good, bad and the ugliness of my quickie free motion quilting.
After it was quilted, I turned it into a pillow by added a plain fabric lapped back and binding the edges.
And then it was ready for it's day in the morning sun.
6 comments:
FYI, the last image is a Flickr viewer–you can click the arrows on the left and right sides of the image to see all the in-porgress images.
Wow - this is gorgeous. It looks perfect on the chair in the sun.
Great journey and result!!
Very sweet! Love that you pushed way beyond the original design! Great vision!
Your pillow is wonderful. thank you for the inspiration to try something different.
Love your design. Thanks for sharing your creative process.
Post a Comment