Showing posts with label magpie sue. Show all posts

Friday, November 11, 2011

Better Late Than Never!

I don't remember whether I shared these two made-fabric heart blocks I put together some time ago. My intention back then was to turn them into a Priority Quilt for the Alzheimer's Art Quilt Initiative for the 15 Minutes group effort. I kind of got stuck once the blocks were assembled.


Whatever magic that needed to happen finally did. Ta daa!


When I finished the binding and hung it up for the first time I realized there was a bit of a black hole in the upper right. That strip of green was calling out for embellishment. A trip to JoAnn Fabircs yielded the tiny hearts and flower buttons (and a massive reaction to the overpowering scent of cinnamon in the store).


I'm quite happy with it now. In fact, I'll be a little sorry to see it go!

Monday, September 12, 2011

Challenge Inspiration

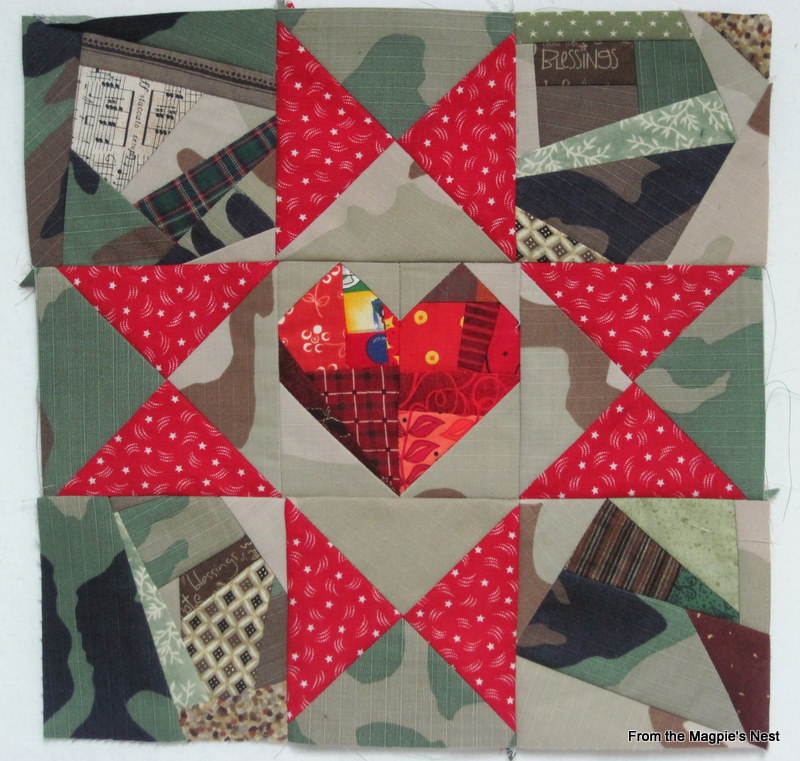
When Victoria asked what inspires us to sew I happened to be working on my block for Operation Uniform.


One of the strongest inspirations in my world is a creative challenge,
some kind of creative problem to solve.
Like turning scraps into a viable block for example.

If the end product can be put to use to benefit someone in need
so much the better.

Color is another source of inspiration for me.
I openly admit to being a color whore.
Walking into my LQS literally takes my breath away sometimes.
I can see exciting possibilities for quilts
of every type and description on the shelves there.
"I want one of everything!"


The hard part is trying to decide which project to work on first. :- )

Wednesday, August 3, 2011

Seesaw Block Tutorial

Remember playing on the seesaw with your best friend? This isn't quite as easy but should be just as much fun. I strongly recommend you read through the tutorial all the way first - there's a picture of the finished block toward the end. It will probably sound way more intimidating than it really is. The trickiest bit is making sure your diagonal lines are headed the right direction.

For this block you'll need a piece (or pieces) of made fabric from which you can cut four rectangles, 3.5" x 6.5" and four 3.5" squares. You will also need four rectangles of background fabric, also 3.5" x 6.5" and eight 3.5" squares.
We're going to begin by making four flying geese units using the four made rectangles and the eight background squares.


Lay one of your background squares on top of one end of a made rectangle, right sides together. If you like you can draw a diagonal line on the back of your square patches, connecting opposite corners as you see below.


I prefer to skip that step. Instead I lay my 6" ruler on top of the stacked patches with the 1/4" line of my ruler falling through those two corners.

When I have double-checked the position of my ruler I make the cut.


That leaves me with a raw edge exactly 1/4" away from where I want the seam to be.


Put it in your sewing machine as you normally would when piecing. I happen to have a quarter inch foot on my machine. You can see here that I'm sewing right on that line I'd drawn.


I chain piece the four rectangles and then run a pair of the off cut triangles through to free the rectangles from the machine. Once they've been pressed you should have this:


Now we need to do the other end of the rectangles to make our flying geese. Lay one of your background squares, right side down, on the other end of each of your made rectangles.


You'll use the same process as you did for the first half of these units. Draw your diagonal line or lay your ruler on the patch with the 1/4" line running through the corners. To get this line going the right direction - so I end up with a flying goose in stead of a parallelogram! - I turn the whole thing around. Essentially I'm working now with the top of the goose at the bottom of the picture.

So I will be cutting along the right edge of the ruler as you're looking at the picture above. Once I've made my cut, sewn the seam, pressed the background out, and have done the same for the other three units, I have four flying geese units:


Now we're going to use the same technique to put a made-fabric triangle on the end of the background rectangles.


I laid a made-fabric square on top of each background rectangle, pulling back the corner of the made fabric and turning the made fabric patch until I'm happy with what will be left after I cut off the extra. This is also a good time to make sure you're headed in the right direction with your line/ cut. In this case we will be making four identical units with the made fabric in the upper left corner of the finished rectangle.

Again, in order to accomplish that I have to turn the patches around so that I'm working from the top of the unit. This time you will be laying the ruler on the back of your made fabric. Cut off the corner, sew the seam, and press the rectangle out. (Or draw a line, sew the seam, trim off the excess, and then press.) Then do the same with the other three rectangles.


You should have four units that look like this:


Now you'll pair up your flying geese units with the rectangles. Sew them together along that long horizontal edge at the bottom of the goose.


You should have four of these when you're done.


Rearrange the four quarters so each goose is pointing in a different direction, right around the compass points:

Sew these together the way you would any other four patch block and you'll have your finished Seesaw block!

I sent my off cut triangles through the sewing machine whenever I needed to take a set of chain pieced units off for pressing.


You should have 12 of these little half-square triangle units to play with. They can be the beginning of a sawtooth border or used in other, smaller, blocks. Here I've arranged four into a Broken Dishes block and another four into a Pinwheel block.


I hope you'll give this a try. Cutting and sewing through all those seams in your made fabric can be a challenge but it's worth the effort. The one thing I've learned is it's more effective to keep the scraps in your made fabric relatively close in color or value and then pick a background fabric with really good contrast to your made fabric. The most important thing? Remember to breathe, and HAVE FUN!

Magpie Sue

Sunday, June 12, 2011

Constructed Stripes

When I saw this top over on Victoria's blog (assembled by the NYC Mod Guild quilters) I fell like a brick.

The directions to the guild members were to make one or more blocks using striped prints or by making stripes of their own. The blocks were to measure 10.5 inches square or 5.5" x 10.5" when they were turned in.

I immediately set about using my 15 Minutes to make stripe blocks. The first day my stripes were slightly less than 5" wide although I did manage to get the necessary length. So the next time I just added long strips to either side of my narrow block. At the same time I was able to piece together one of the half-blocks.


And now I'm on my way to having a stripey quilt of my very own! Fun!

Magpie Sue


Monday, April 18, 2011

Mini Swap Done!

I made three 12" blocks with the "Something From Nothing" mini quilt swap in mind:


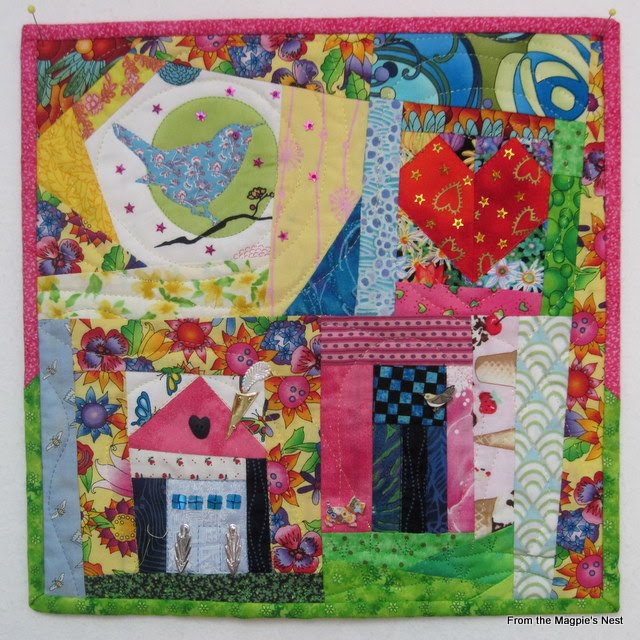
These were all created from scraps laying around. None of them really 'spoke' to me though so I made a fourth attempt. This one began with a house block and a tree block that had magically appeared some time ago when I was piecing scraps. The bird jumped out of Victoria's scraps into the mix and before I knew it I had a complete top!

I even had scrap binding that fit perfectly around this little quilt. I did some machine quilting on it first but couldn't resist putting my personal stamp on it with a few embellishments. ;- ) You know, now that I think about it, back in kindergarten my favorite thing to draw was a house with a tree next to it!

Friday, April 8, 2011

The Other Half of the Swap

A quick look back revealed that I had not posted my process with Janet's inuition block. Sorry about that! This is what Janet originally sent to me:


All that lovely color! The first thing I did to it was to add strips I had laying around. I felt it needed a little value change and threw in that really light strip. A little too light in hindsight.


The bottom strip is actually pieced of triangles. Tiny freestyle flying geese in fact, although the value contrast is not sufficient for that to show up in this photo.

At this point I got stuck. I know I posted about some of the blocks I was making, sticks and things, thinking some of them might end up in this project. As it turned out, they didn't seem to really fit. Eventually I felt drastic action was called for. I slashed right through Janet's block. My first thought was to quarter it but after that first cut I was afraid any further cuts would make the resultant pieces too small to be pleasant to work with. I really liked that slash of pink through there though!


Janet has since revealed that she's not really a "pink person" but I felt more of it was called for. I made some more freestyle blocks and played some with them on the design wall...


I felt fortunate to have some of the same cat print that was in her origianl block. I was able to make some additional blocks using it. These stick blocks could have been arranged to make an interesting line...


It seemed like I either ended up with too much blue or too much pink for a while there.


In the end the line of sticks didn't make it into the final quilt top. I think I sent Janet a fairly balanced composition though:


I also sent her some of what didn't end up in the quilt top. Maybe she'll figure out a way to tone down that pink. ;- )

Look What She Did!

It's a good thing, trust me ;- )
Our Fearless Leader set Janet and me up to do an intuitive swap. This is what I sent to Janet:

While I worked on the block she sent to me - wait, did I ever show that here? I'm pretty sure I shared my process on my blog... hmm. Anyway, eventually this little package showed up in my mailbox:


And in it was THIS!


In the card she sent with the quilt top Janet says that first she went round it with the white print and then the scrappy purple border. "It was looking fabulous, but too much like a round robin quilt... I knew I wanted to add the green and white HST's but what to do first? With a sense of daring I slashed across the block and inserted the dark purple strip." Which I think is kind of funny since I got to a point with her top where I had to gird my loins and just cut into it too!

Janet continues: "This didn't really improve things... so I slashed again down the center of the purple strip and turned the pieces so they were facing out. Added the white strip in between and sewed them together." This process turned the whole thing into a parralellogram. Not wanting to leave me with that she tried the scrappy piano keys to one end but felt they needed some separation from the piecing I'd done so inserted those long strips first. At this point she felt it was time to add the half square triangles. Then, because she liked the stripes and the the way they echoed the piano keys at the top, she added the multicolor stripe along the bottom edge. Now I get to figure out how to fill in that corner - and decide how much bigger I want the final product to be. We're not sure whether we'll be swapping these tops again. It won't be any time soon as we both have other projects in the queue that need attention. I, for one, am working on a mini quilt for the "Something From Nothing" swap here. I thought I had a little top almost ready to layer and quilt but it turned out not to be quite the right size. And then it magically got TOO big! Ah well, that just means I get to play another day. :- )

Tuesday, March 15, 2011

Intuitive Swap Continued

So after I'd slashed Janet's block and inserted that strip with the bright pink I wanted to include more of the bright pink. I really liked the way it brightened up the whole. I stacked and sliced the pink, the cats, and a light blue:


Then I tried some sticks blocks, using the blue as background. I discovered that by alternating the direction of the sticks I could get a wavy line, which I really liked.

This was a promising development and spurred me on to try lots of different arrangements of the various blocks I'd made.


The problem (in my opinion) was that I now had too much of the light blue. It was distracting. Time to try to work in other fabrics, get more variety in the prints and colors.


As I made blocks and sewed them in place I also sewed together the offcuts, creating a little strip. It turned out to be just the thing to finish off the top edge!

This is what I will be returning to Janet, along with some of the blocks I made but didn't use. I forgot to measure the top at this stage but it's somewhere between 30 and 36", not quite square. It will be fun to see what she does with it now!

Intuitive Swap - In the Beginning

This is the block I received from Janet.


I sat with it for a couple of days, just enjoying the colors and prints. Then I sewed together some wonky half square triangles into a sawtooth row, added some strips and piecing I'd done for other projects, and had this:

It took a couple of days (at least!) to get it that far but after that I was well and thoroughly stuck. I think I showed y'all some of the blocks I'd made with this project in mind but I wasn't happy with what was developing. Then one day I had the presence of mind to ask myself "What is the most dramatic thing I could do to Janet's block?"

The answer was to cut it into quarters. Well, that was a bit too drastic for my nerves but I did slice it. And then I inserted a strip off of some other experimental piecing I'd done.

I'm happy to report that that was enough to get the ball rolling again. I'll show you what happened next in another post...